Rating of the best thread gauges for 2025
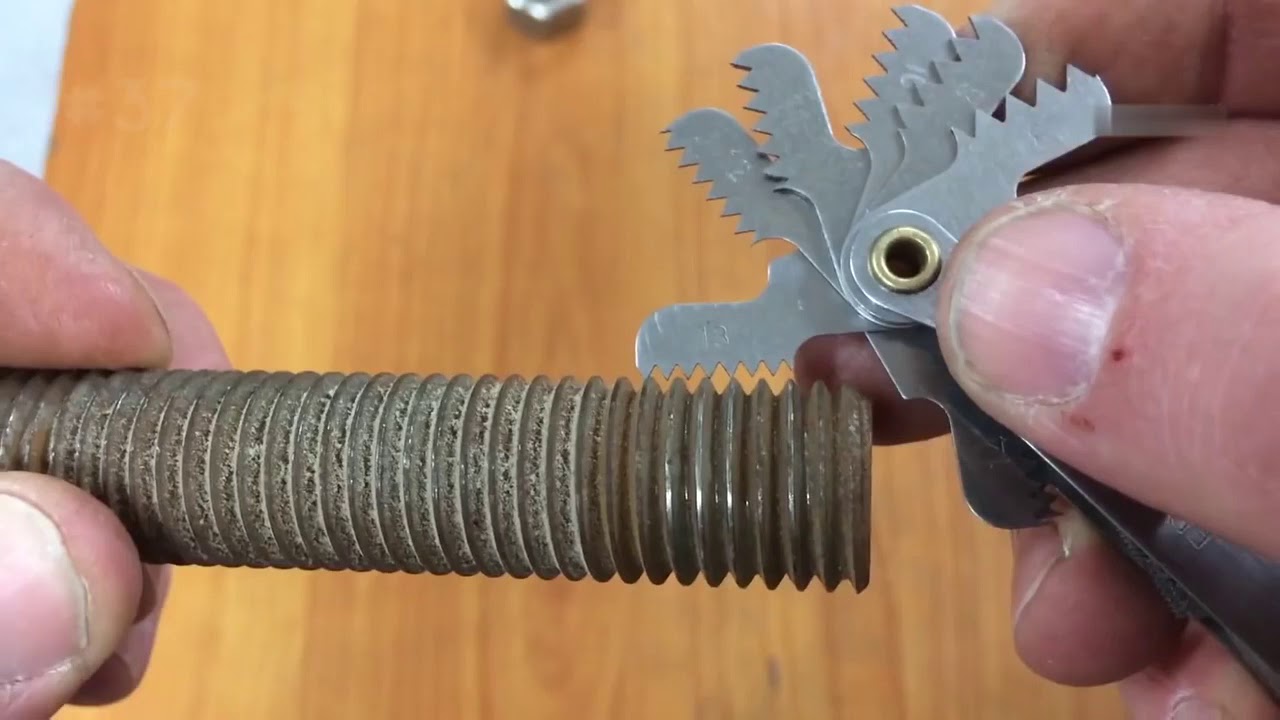
When cutting on various parts, it is often necessary to use not only dies or taps, but also thread gauges. This tool is able to determine the profile characteristics of the thread, which in the future will eliminate the risk of problems with the manufacture of the same type of connections in certain workpieces. With the help of this device, it is possible to evaluate the accuracy of cutting, therefore, specialists whose professional activities are directly related to the production of threaded blanks need a thread gauge on an ongoing basis.
The thread can be made in both inch and metric. It is mainly applied to various joints of pipeline elements, namely to plastic or metal fittings, which are used to install pipes in pipelines that are different in purpose.In Russia, parameters for threaded parts are used, which are fixed by the relevant regulatory documents - state standards. It is they that contain detailed technical information from metric / inch threads, which the master should be guided by when applying screw notches.
Content [Hide]
- 1 The design and scope of the thread gauge
- 2 Existing types of template thread gauges
- 3 Existing types of thread and their features
- 4 Features of the measuring process
- 5 cutting technology
- 6 Accuracy class and marking rules
- 7 Rating of the best thread gauges for 2025
- 8 Instead of an epilogue
The design and scope of the thread gauge
The main function of the thread gauge (it is also a template for determining the thread pitch) is to monitor the state of the thread itself and its compliance with established standards. This tool is often used in the metalworking industry, at engineering enterprises, during assembly / repair work on a variety of equipment and machines.Simply put, any repair shop or assembly shop is simply required to have a set of thread gauges in its toolkit for the purpose of profile checks of thrust, trapezoidal or angular threads.
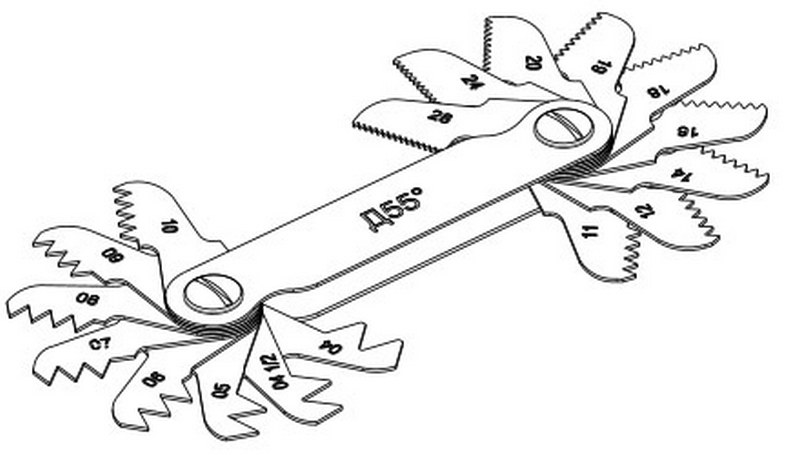
The device itself is a set of templates made of metal plates with a thickness of about 1 millimeter. At one end of the plate there are special cutouts that correspond to the size of the thread being measured, i.e. profile and pitch. These toothed plates are also referred to as combs. On their metric versions, the thread pitch is set, and on the inch ones, the number of threads per inch is indicated.
Thus, by means of the considered device it is possible to determine:
- Threaded pitch;
- The number of threads per certain unit of distance;
- State of wear of notches (threads);
- Thread compliance with the parameters established by state standards.
Existing types of template thread gauges
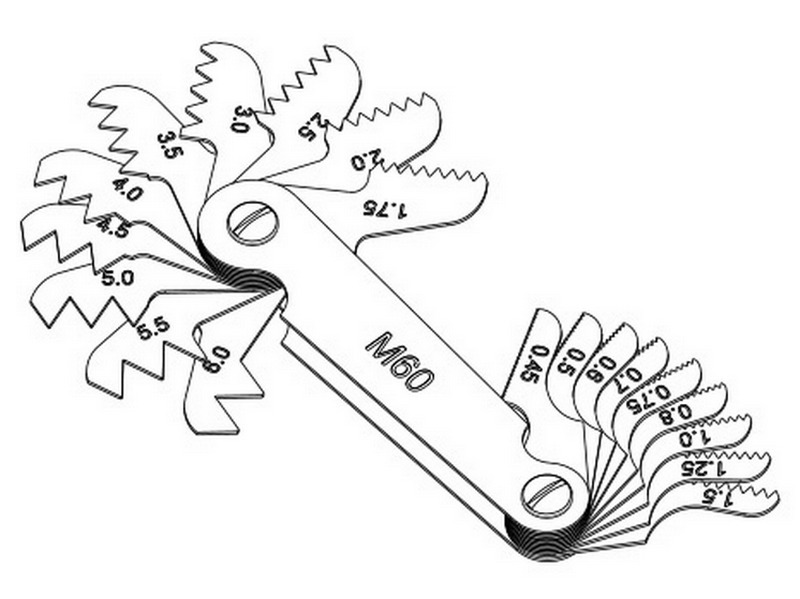
Metric Samples
Usually they have a designation on their working part in the form of the inscription "M60", which means the magnitude of the degrees to the profile of the metric thread. The process of using this device is quite simple - you just need to sort through the available templates and choose the one that best fits into the groove according to the depth of the measured groove on the part. Then it remains only to read the marking, which is applied to the suitable template. It is also possible to combine the use of a template with a vernier caliper and, as a result, obtain more complete information about the characteristics of the measured screw thread. It is worth noting that the parameters of the thread used must always be already fixed by state standards - otherwise, the applied thread will be considered a marriage.
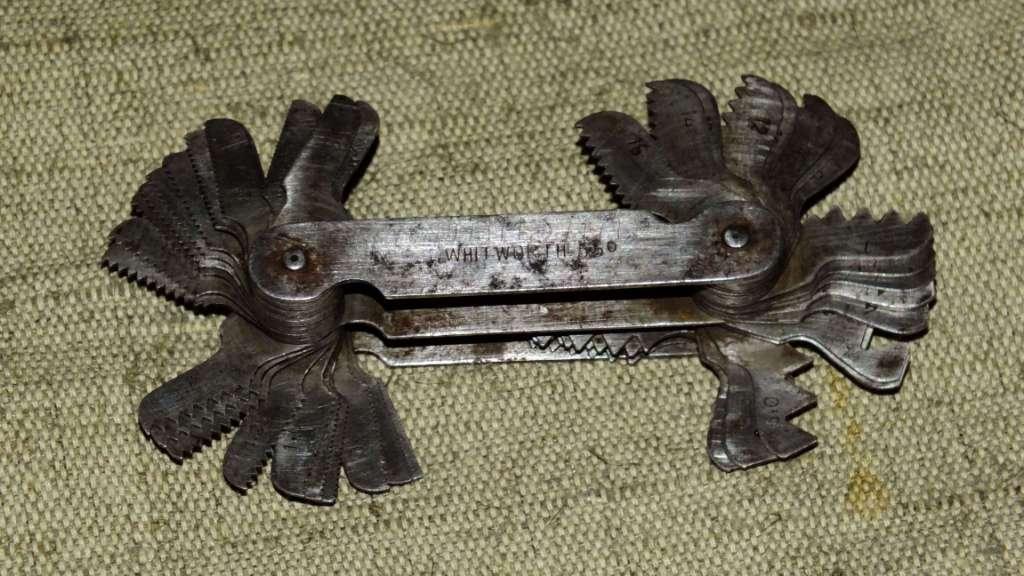
Inch samples
They are used to measure the characteristics of inch and pipe screw joints. With the help of these instruments, it is precisely the number of turns along the length of a certain unit of distance that is measured. The body of such thread gauges is marked “D55”, which means that the angular degree of profile pipe / inch threads has an indicator of 55.
Existing types of thread and their features
Metric
On the territory of Russia, it is most often used in the production of equipment and machines, as well as a variety of household appliances. The range of diameters for metric threads is very large and can range from one to six hundred millimeters. The step for the metric is measured in millimeters, and the spread of numerical indicators varies from 0.25 to 6 millimeters. If we talk about the profile of metal cutting, then it should look like an equilateral triangle, in which the angle at the top is 60 degrees. If the metric system must be used for the product, all these dimensions are marked with the letter “M” in its technical documentation for it. This system is extremely common in the engineering field, so it is difficult to imagine this industry without its use, due to ease of use. Indeed, metric threads are easy to manufacture, characterized by versatility and increased reliability.
Inch
It differs in that its degree of angular profile has a quantitative index of 55 units, and the cutting pitch is measured not in millimeters, but in the number of turns per inch distance. It is easiest to find such cutting in old foreign equipment or in the joints of various sections of pipelines.
Cylindrical (aka pipe)
As well as the above thread, this one has a profile of 55 degrees and its pitch is also measured by the number of turns per inch distance. That's just it is used due to its specifics exclusively for pipelines and is marked with the letter "G".
Additional differences
In a comparative analysis of thread ridges, it can be noted that the ridge of inch threads is sharper than that of metric ones. Which is not surprising given the set standard of 55 degrees versus 60. Thus, differences can be seen even with the naked, but experienced eye. Naturally, the measurement systems themselves are different for them, and it is especially worth remembering that when using these standards, it is not the generally accepted length of an inch that is set for the metric system of 2.54 centimeters, but it is equal to 3.324 centimeters, because. is special. As an example, the following calculation can be given: if in the metric system the thread diameter is 25 millimeters, then in the inch it will be equal to ¾ inch. In any case, to select the exact value, you should always consult the corresponding table in the national standard.
Features of the measuring process
To measure the pitch of an inch thread in a pipe, the following algorithm should be used:
- For the role of a classic template, it is possible to use a fitting or coupling, whose characteristics of the internal thread fully comply with the state standard;
- The bolt, whose thread properties are to be checked, is screwed into a fitting or coupling;
- In the case when the bolt has formed a complete threaded coupling with the fitting / coupling, this means that the pitch / diameter of the thread applied to its surface completely coincides with the desired pattern;
- Otherwise, if the bolt cannot be screwed in, or it is screwed in, but there is a loose coupling, then it is worth changing the fitting / coupling as measuring devices. Using the same method, you can also measure the internal pipe thread, but then you should use a blank with an external thread.
The use of a thread gauge does not create any problems at all:
- First of all, the type of thread applied is established - metric, inch, pipe;
- Further, by simple enumeration, various templates of the corresponding tool are alternately applied to the cutting;
- When a tightly fitting template is found, an identification marking is debited from it, which will mean the step required for determination;
- To measure the outer diameter, coupled with a thread gauge, an additional micrometer or caliper is used.
Mathematical (non-tool) method
It is possible to do without a thread gauge-template. To do this, simply leave an imprint of the thread of the part under study on a blank sheet of paper (outlined with a thin pencil), and then the calculation is made according to the formula P \u003d L / N, where:
- P - thread pitch;
- L is the length calculated using an ordinary ruler;
- N is the number of printed turns.
cutting technology
Cylindrical pipe threads can be inch types (both external and internal) and can be carried out both manually and on the machine.
It can be applied manually as follows:
- The process takes place using a tap / die used as a hand tool. If an external thread is required, then a die is used. For internal threads, a tap is used;
- To begin with, the pipe blank is securely fixed in a vice, and the processing tool is clamped in a die holder (for dies) or in a wrench (for taps);
- Then the tap is inserted into the inside of the pipe, and the die, respectively, is put on the outside;
- Next, the device used is rotated, by which a threaded step with the necessary parameters is applied;
- For a more accurate and cleaner result, the whole process is repeated several times.
Use of turning equipment:
- The pipe being processed is tightly fixed in the machine chuck, and a cutter of the required type is installed on its support;
- Working on the pipe end, the fissure is first removed, and then the caliper displacement speed is adjusted;
- After the cutter is brought to the surface of the workpiece, the thread feed mode is turned on.
IMPORTANT! It must always be remembered that inch cutting is only done with such mechanical equipment and on such tubular blanks whose rigidity and thickness are sufficient to withstand the mechanized process. It is worth noting that mechanical processing allows you to get the most high-quality and effective result, but it will directly depend on the qualifications and experience of the operator.
Accuracy class and marking rules
In accordance with the regulation of state standards, inch threads can have three accuracy classes - from the first to the third. Next to the corresponding figure, a letter marking is made in the bidet of the letters "A" or "B", which mean "internal" and "external" threads, respectively.From this it is clear that the 1st class will correspond to the roughest quality, and the 3rd class will be the most accurate and very strict requirements apply to it.
International marking standards
In order to understand what characteristics this or that threaded component corresponds to, one should only correctly understand the marking applied to it. Most foreign and domestic manufacturers use the same standards. Thus, if you correctly understand the applied information, then you will not have to use a thread gauge.
The traditional set of information includes:
- Outer diameter (i.e. nominal size) - the first number;
- The number of threads per inch of distance;
- Group affiliation;
- Cool accuracy.
IMPORTANT! A Western manufacturer may have the letters “LH” (left handled) in the information about inch threads, indicating that the turns of the part have a left rather than a right direction.
Also, on the details of foreign production, you need to pay attention to the following points:
- Highlighting a specific color exists only for parts with inch threads;
- In units of "tpi" (threads per inch), next to the inch value, the step size in millimeters can be indicated;
- Usually, the threaded groove is absent on joints having a tapered thread.
In addition, it should be mentioned that foreign fittings of the conical type NPT and BSPT are visually very similar, but the latter have a mark in the form of a notch-risks on the hexagon. Hence, it is often possible to confuse the standards used by American enterprises - UTS UNF (inches) and UNC UNF (meters) on these fittings. So, the notch-risk will indicate the use of the metric system.In any case, in case of extreme doubt, it is always possible to measure the part with an appropriate thread gauge.
Rating of the best thread gauges for 2025
Budget segment
3rd place: "Autodelo M60 0.5-7.0 mm 40384 11083"
votes 0
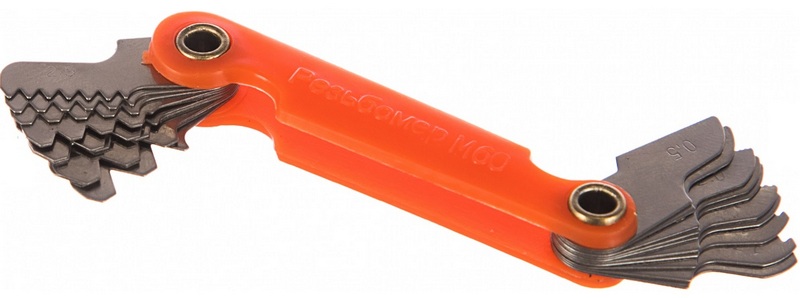
This model uses the metric system, is very easy to use and does not require any professional skills. It is the optimal solution for performing metric measurements and determining the accuracy of cutting. The release was carried out by the stamping method in a qualitative way, the sample does not have gaps that interfere with measuring accuracy. Templates are made of calibrated steel, resistant to mechanical stress and wear. Number of templates - 20 pieces, weight - 15 grams, country of origin - Russia. The recommended retail price is 100 rubles.
- Easy use without special knowledge;
- Light weight;
- budget cost.
- Somewhat flimsy plastic case.
2nd place: "GRIFF D55 D155005"
votes 0
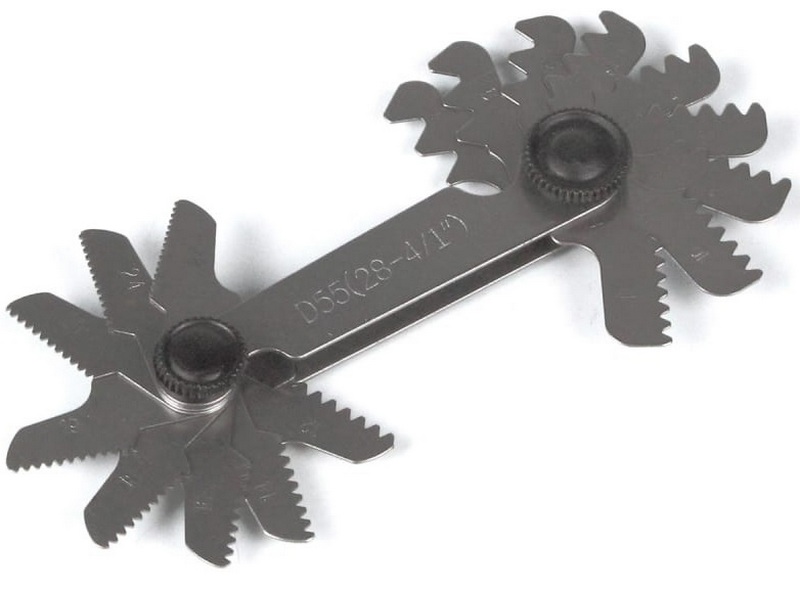
This gauge-template works in inch measurement system and is specially oriented to take measurements when turning various parts. However, that does not negate its use for standard checks. The device will be useful both at home and in industrial production. The templates are made to high precision standards, which makes the error to a minimum. The small size of the product allows you not to worry about its special transportation in a case. Number of templates - 17, weight - 30 grams, country of origin - China. The recommended retail price is 190 rubles.
- Small dimensions;
- Measurement accuracy;
- 17 universal sizes.
- narrow focus.
1st place: STAYER PROFI 0.5-1.75 mm 28041
votes 0
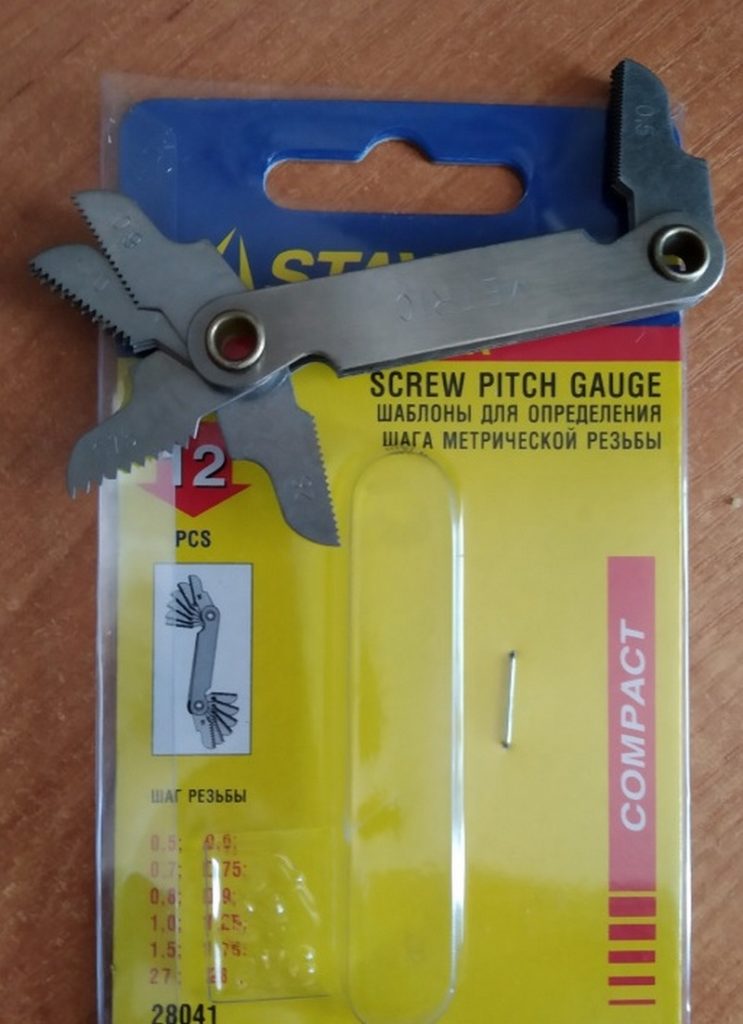
This thread gauge is a quality fixture made of durable metal. The system used is metric, in total sizes are available from 0.5 to 1.75 millimeters. There are two templates for measuring pipe threads - 27 and 28 tpi. The set includes 12 templates, has a mass of 30 grams, the country of origin is Germany. The recommended cost for store sales is 320 rubles.
- Added two plates for pipe measurements;
- Durable manufacturing material;
- Inexpensive cost.
- The blades may not spin well at first (time or a drop of oil may solve the problem).
Middle class segment
3rd place: WIEDERKRAFT WDK-MG60
votes 0
A simple and at the same time extremely functional model, released by a high-quality European brand. It consists of 20 plates for measuring sizes from 0.4 to 6 millimeters. Measurements are taken using the metric system. The number of templates is 20 pieces, it has a mass of 30 grams, the country of origin is Germany. The recommended store price is 450 rubles.
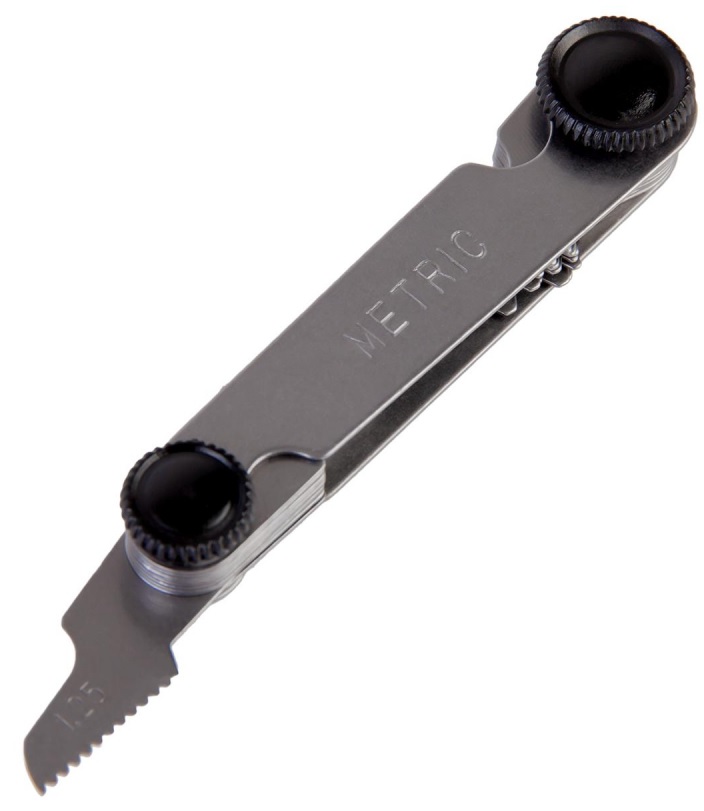
- Rugged housing;
- Well-known and high-quality German brand;
- Does not require carrying in a case.
- Small thread pitch.
2nd place: "CALIBRON 463691"
votes 0
An excellent and high-quality model from a Russian manufacturer. It has all the necessary qualities, despite the fact that you won’t have to overpay for the extra. Quietly work on all common sizes in the metric system from 0.4 to 6 millimeters. The case and components are made at the proper level of high-quality metal.The error declared by the manufacturer is only 15 micrometers. There are 20 templates-plates, the weight is 100 grams, the country of origin is Russia. The recommended cost for retail chains is 670 rubles.
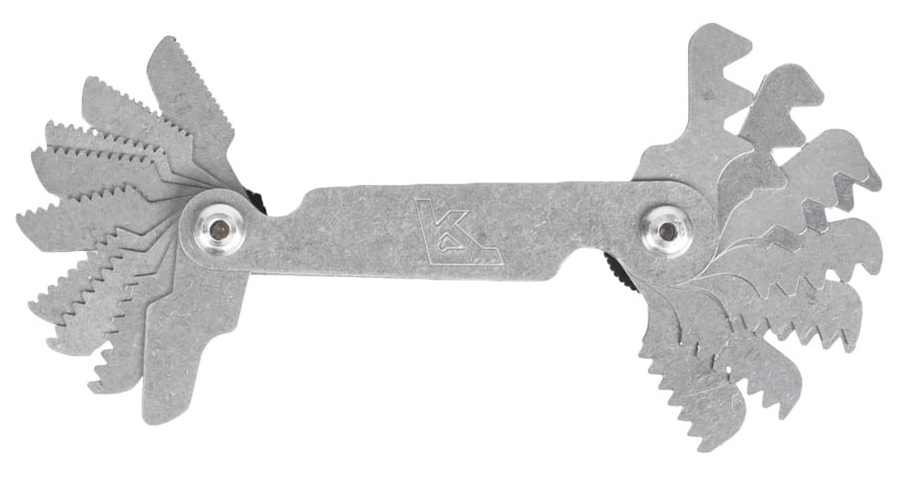
- Weighted body;
- Small measurement error;
- Small dimensions.
- Not detected.
1st place: CHIZ N1 М60 54563
votes 0
Another representative from the Russian manufacturer. Oriented to work in metric systems. The case is made of durable steel, and the measuring plates are 1 mm thick, which eliminates their susceptibility to increased mechanical stress (they resist even strong bending). The error declared by the manufacturer is only 15 micrometers, the plates in the set are 20 pieces, the country of origin is Russia. The recommended retail price is 750 rubles.
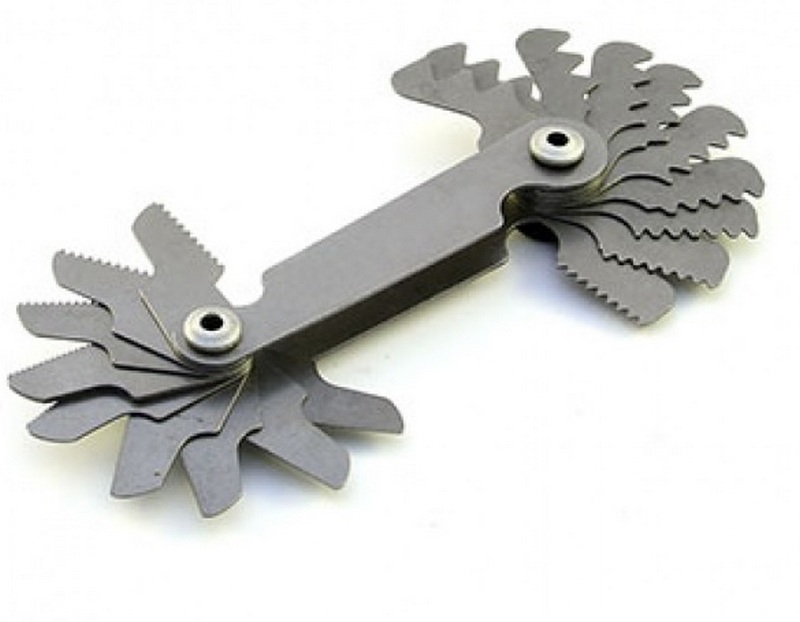
- Reinforced housing;
- Reduced measurement error;
- Adequate value for money.
- Not detected.
Premium models
3rd place: "Kinex М+W+G, 58"
votes 1
Simply a universal thread gauge that can work in both metric and inch systems, and can also measure cylindrical threads. The number of probes is able to satisfy any requests of a professional turner. Despite its large dimensions, the model is not very heavy - it weighs only 100 grams. At the same time, the number of probes is 58 pieces. The step varies from 0.25 to 6 millimeters, the error is no more than 10 micrometers. The recommended price for store sales is 1500 rubles.
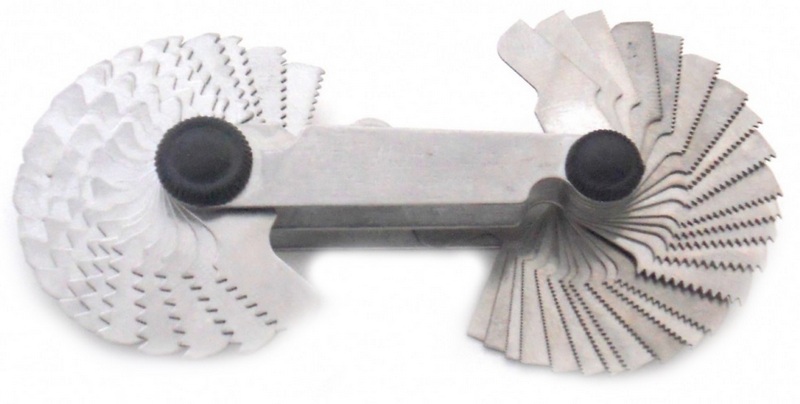
- Extremely advanced functionality;
- Light weight with a large number of probes;
- Ability to work simultaneously in three systems.
- High price.
2nd place: "metr/Whi/BSP SCHUT"
votes 0
An excellent product from a Dutch manufacturer that can determine the completeness of the profile and the pitch on a metric thread, and can also work with special types of Western European fittings that are connected using Whi and BSP technologies. Includes a set of 58 serrated blades firmly mounted on a high-quality metal clip. The error is no more than 8 micrometers, which makes the overlay process highly accurate. With all its functionality and large dimensions, the weight of the device does not exceed 100 grams. The recommended cost for retail chains is 1800 rubles.
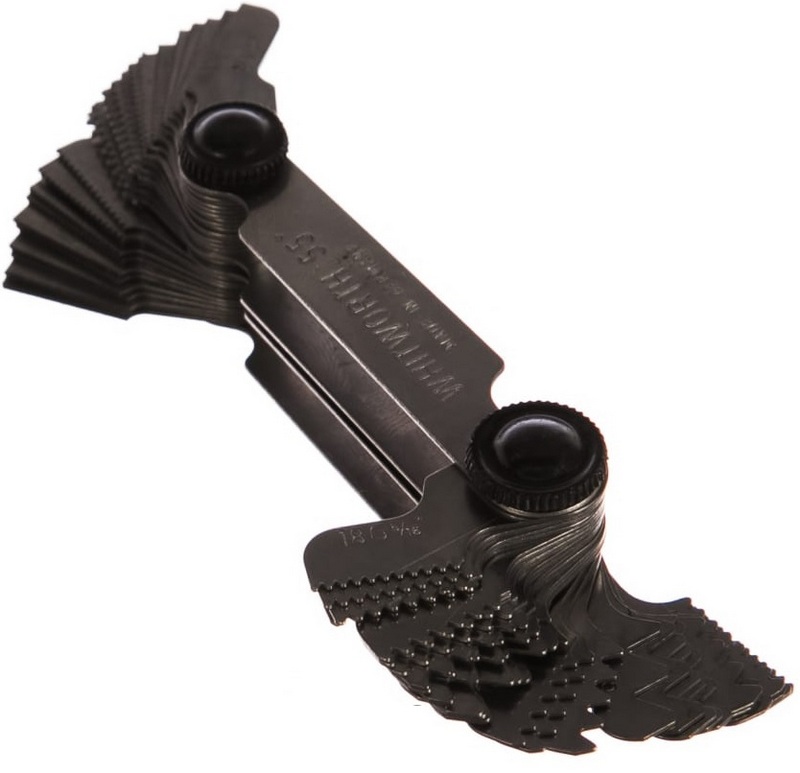
- High functionality;
- Ability to work with Western fitting special cuts;
- Quality metal workmanship.
- Overpriced.
1st place: "INSIZE Tr 30"
votes 1
An extremely expensive and high-quality radius-type device designed to measure the pitch and thread profile. In general, radius thread gauges are considered very accurate, more precisely, their measurements can only be made using a laser. Specifically, this model has an error of only 5 micrometers. At the same time, the model cannot boast of an abundance of measuring plates - there are only 12 of them. The model is made in Germany and has a weight of about 180 grams. The manufacturer claims an extended service life, initially high-quality work of the tool, which does not require any “buildup” (all components and blades open and lock freely). In order to maintain accuracy properties and prevent tooth grinding, storage and transportation is required only in a branded case.The recommended retail price is 3200 rubles.
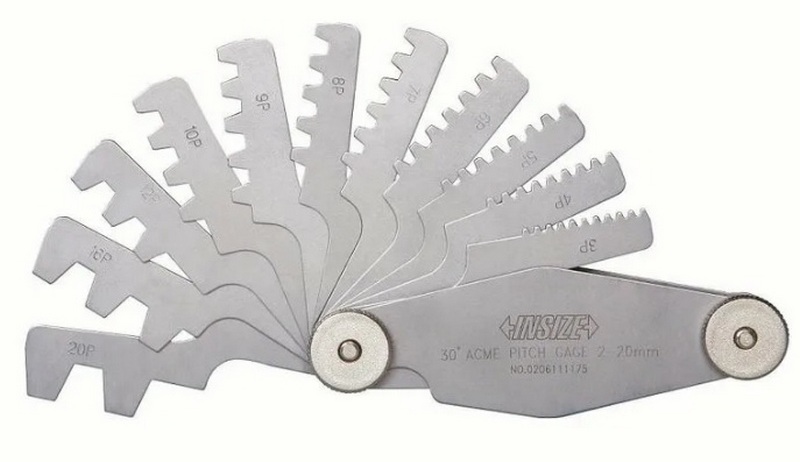
- Very high accuracy;
- Titanium case;
- Radius design.
- Extremely high cost.
Instead of an epilogue
The analysis of the Russian market of thread gauges found that the most popular models are the budget segment, in which, for the most part, Asian samples are represented. However, the quality of these samples, as well as their margin of error, plus the use of cheap materials in the construction (up to plastic) do not make them good recommendations. At the same time, this situation is determined by the unpretentiousness of the Russian buyer, the lack of need for high-precision measurements and the banal desire to save money. Therefore, it is quite possible to trace a trend in which the Russian will prefer a model in which the petals will be pulled out poorly, but at a cheaper price, and in the hope that over time they will “developed” and it will become easier to get them. Nevertheless, as practice shows, thread gauges at a price of 100-200 rubles do not last long and even lubricating their mechanisms with oil does not lead to the desired result.
The preferred options are considered to be from the middle segment, successfully combining price and quality. Yes, their error is rarely below 15 micrometers, but for domestic tasks, greater accuracy is not required. In addition, most models in this segment have a durable case that can last for a long time. Thus, it is these samples that can be considered the best option.
new entries
Categories
Useful
Popular Articles
-

Top ranking of the best and cheapest scooters up to 50cc in 2025
Views: 131652 -

Rating of the best soundproofing materials for an apartment in 2025
Views: 127693 -

Rating of cheap analogues of expensive medicines for flu and colds for 2025
Views: 124520 -

The best men's sneakers in 2025
Views: 124034 -

The Best Complex Vitamins in 2025
Views: 121941 -

Top ranking of the best smartwatches 2025 - price-quality ratio
Views: 114981 -

The best paint for gray hair - top rating 2025
Views: 113396 -
Ranking of the best wood paints for interior work in 2025
Views: 110320 -
Rating of the best spinning reels in 2025
Views: 105330 -

Ranking of the best sex dolls for men for 2025
Views: 104368 -

Ranking of the best action cameras from China in 2025
Views: 102217 -

The most effective calcium preparations for adults and children in 2025
Views: 102012

